How to Make a Miniature Cloaked Figure from The Traitors TV Series (Polymer Clay)
Are you a fan of The Traitors TV Series? I know I am, which is why I decided to try my best at making a miniature traitors figure complete with swinging lantern and gravestone all from Polymer Clay.
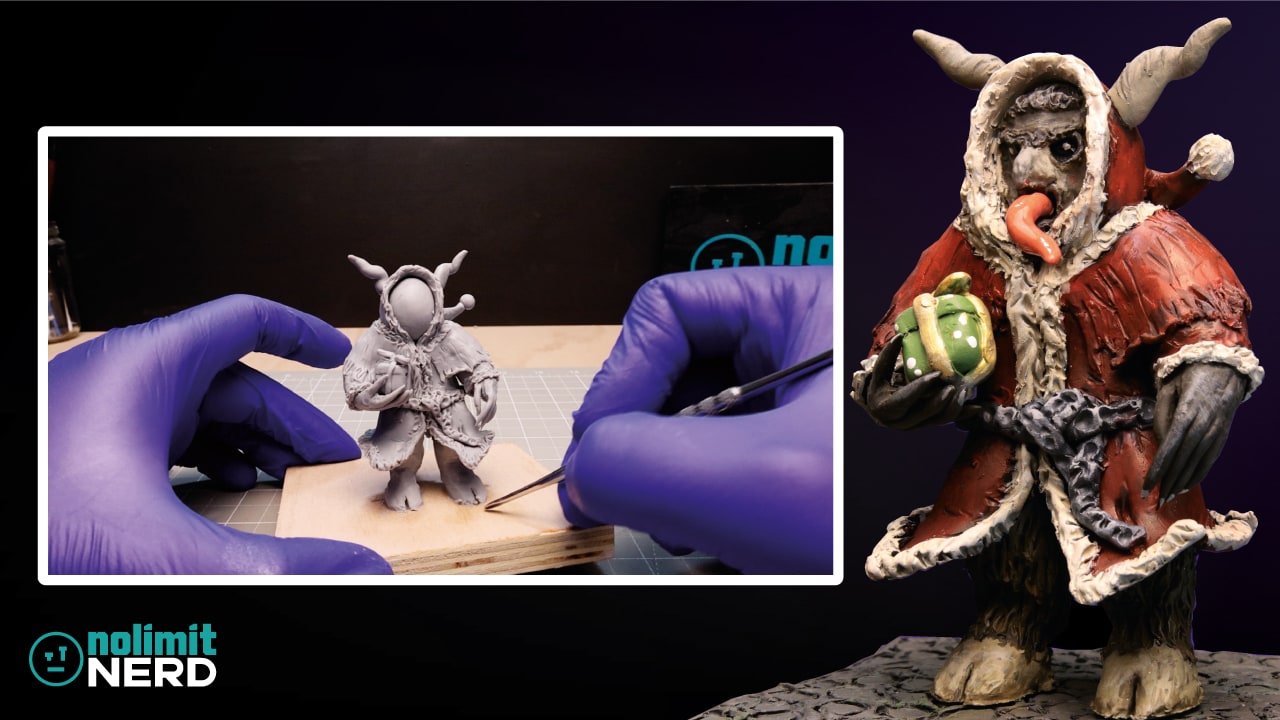
Watch the video to see how I did it, or read on for more detail on what you need to do to create your very own miniature Traitor character.
Step 1: Gather Your Tools & Materials for Sculpting a Traitor
If you’ve read any of my clay modelling tutorials here on NoLimitNerd.com, then you’ll already know that setting yourself up and grabbing all the tools and materials you’ll need for each stage at the start is not only a time-saving process but also a necessity to ensure your productivity and focus.
In this case, it was time to condition my CosClay into flat pieces using my Pasta Maker, clean my sculpting tools, and ensure my desk was dust-free.
After that, it’s time to grab your reference images and any sketches you’ve done and set them up around your workspace so that you have everything at hand when you need it.
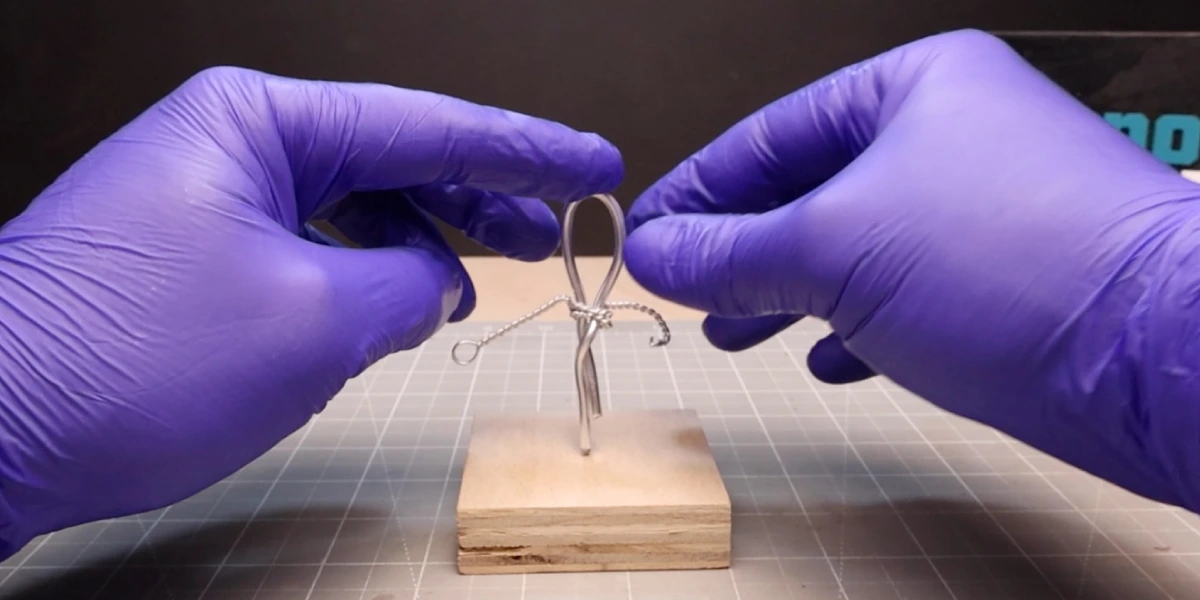
Step 2: Creating the Armature & Base
To get started, I grabbed a piece of plywood to use as a base to attach my model. I then grabbed a 3mm strip of armature wire and made it into a loop with a few bends.
I then grabbed some smaller 1mm armature wire to use for the arms so that I could position them more easily to hold the lantern.
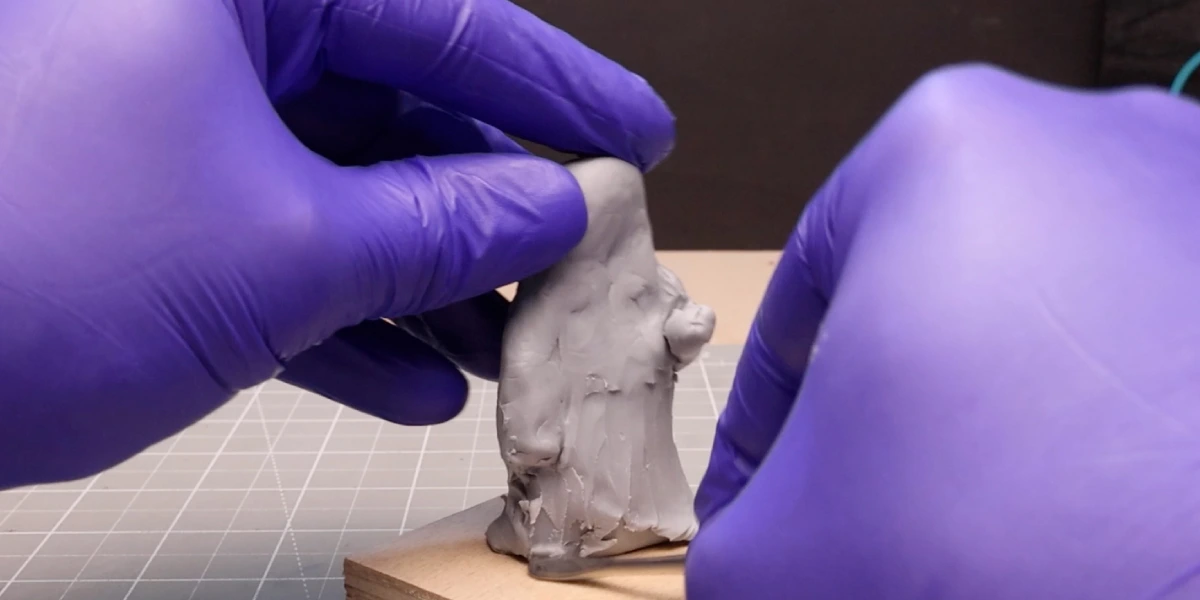
Then, it was time to wrap the wire body in tin foil to help save on clay before wrapping it in a layer of polymer clay to start forming the basic shape of the Traitor. It looks more like Swamp Thing than a Traitor, but hey, it’s a starting point.
With the basic shape created I then drilled some holes in the wooden base, glued in some 3mm armature wire and gently pressed my model on to the wire to create a sturdy base from which to work from.
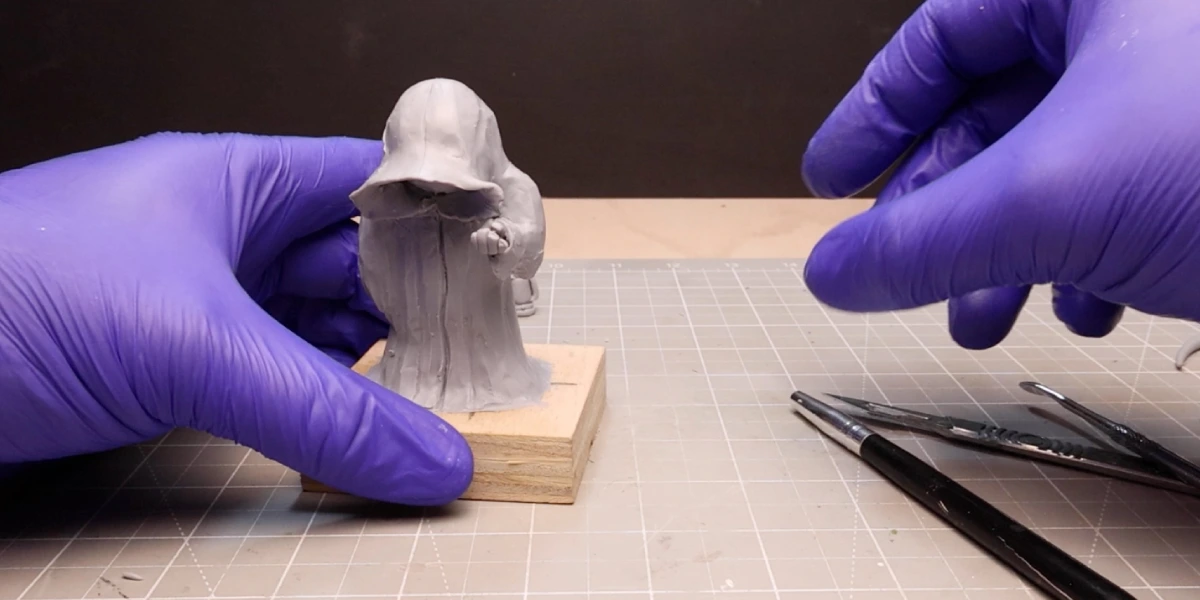
Step 3: Making a Traitor
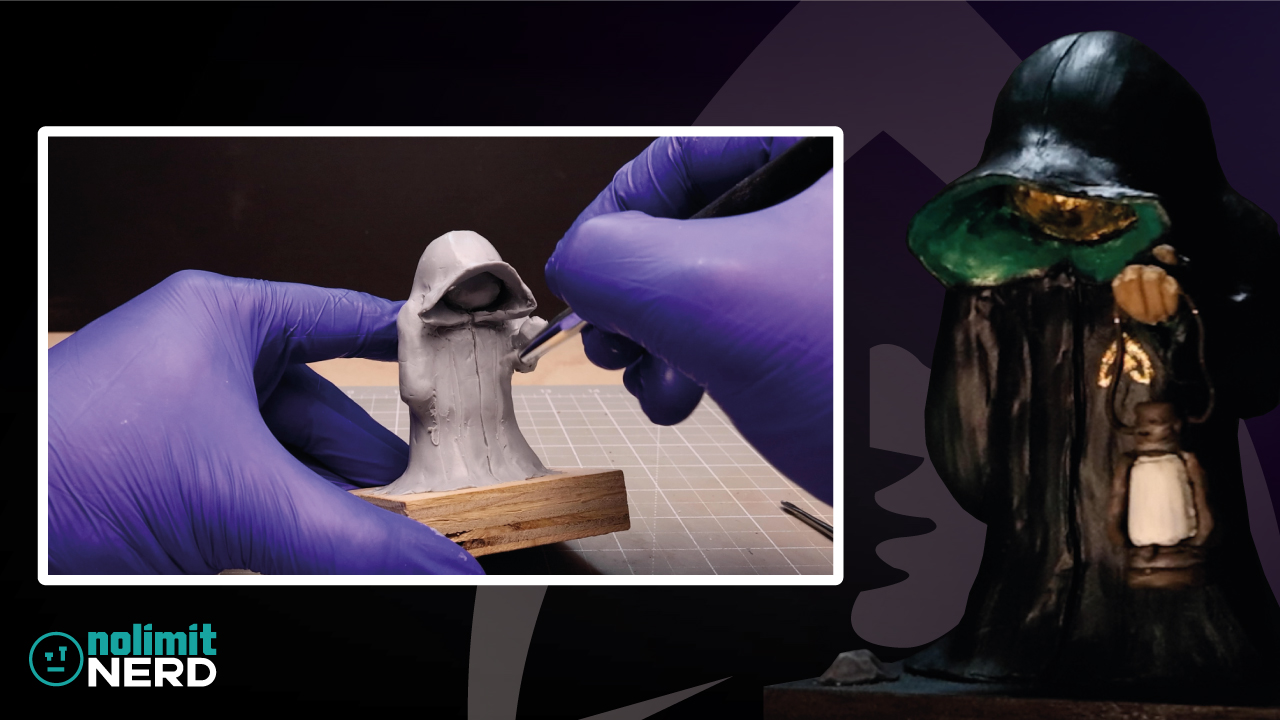
One of the key focal points of the Traitor figure is the hood. So, with that in mind, it was time to take a sheet of clay, curl it around the top of the blob of clay, and then blend it into the rest of the body.
With the hood created and a few marks added to give the look of cloth, it was time to figure out the position of the arms and smooth everything out a little before moving on to making the mini lantern.
Step 4: Making a Mini Lantern
To make the mini lantern, you’ll need to take a sheet of clay and use different-sized circle-cutting tools to help create the base and top of the lantern.
To create the glass light itself, you’ll need to form a small worm of clay and cut a few thin strips of clay for the handle.
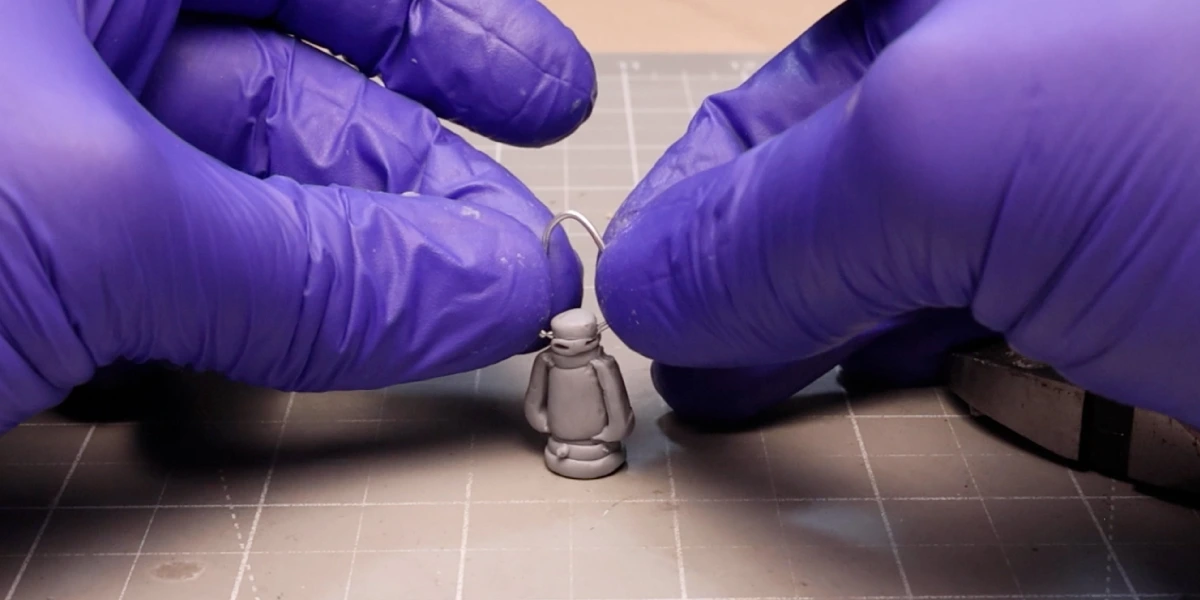
You then stack the circles, followed by the worm and more circles, on top of each other to form the lantern. You add the clay strips to each of the sides from the top to bottom circles. Then, I just bent some thin armature wire to create a metal handle and pushed the ends into the top of the clay directly above the top of each handle.
After that, it was time to finish off our figure.
Step 5: Finishing the Traitor
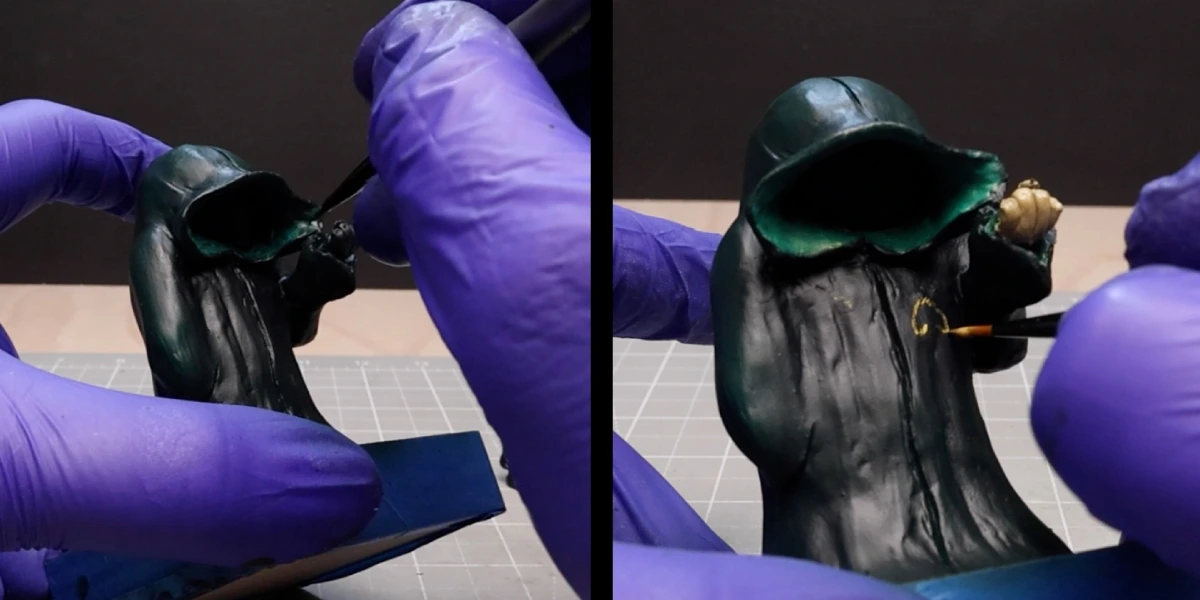
To make the hand that holds the lantern, you’ll need to roll up some thin worms of clay, add them next to each other, and shape them to form a cupped hand.
You’ll then need to add the hand to the out-of-reach sleeve we made earlier, ensuring you do not squish the clay too much and ruin your detail.
With the other arm, I chose not to have a hand and just have it look like the arm was hidden by its side to avoid adding too much detail to the figure.
You’ll also see that with the head, I chose to keep that simple as the face is typically hidden from view by a golden mask, so it is just a matter of smoothing and shaping the face a little.
Step 6: Making a Miniature Gravestone
To add some extra details to the scene, I thought it would be a good idea to add a miniature gravestone.
For this, you’ll need to roll out a thicker piece of clay and cut out the shape of a gravestone, giving it a slight curve at the top two corners, two straight sides, and a straight bottom.
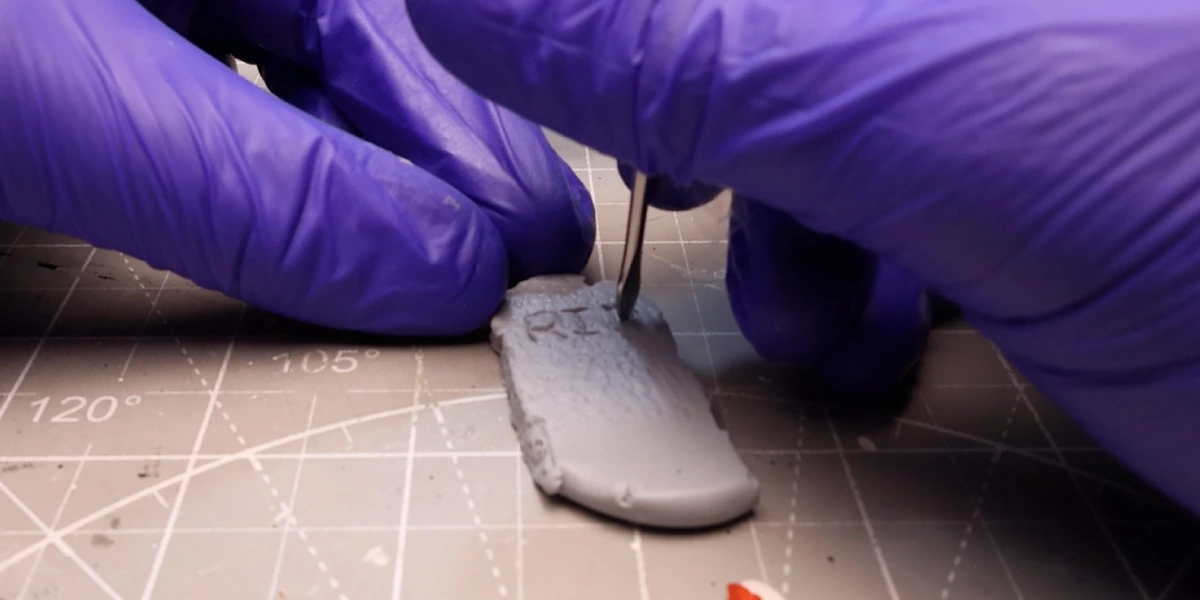
You can then add some detail to the clay with your sculpting tool to create a warm and battered stone effect before adding the letters R.I.P. to the mix.
And there you have it, a small gravestone ready for baking.
Step 7: Smoothing Out the Wrinkles & Prepare to Bake
As I’m using CosClay I’ll need to bake the clay to ensure that it turns hard, ready for painting later.
To ensure that the Traitor’s cloak looked smooth and to help remove any fingerprints or unwanted marks, I gave it a wash of Isopropanol alcohol before putting it into the oven to bake.
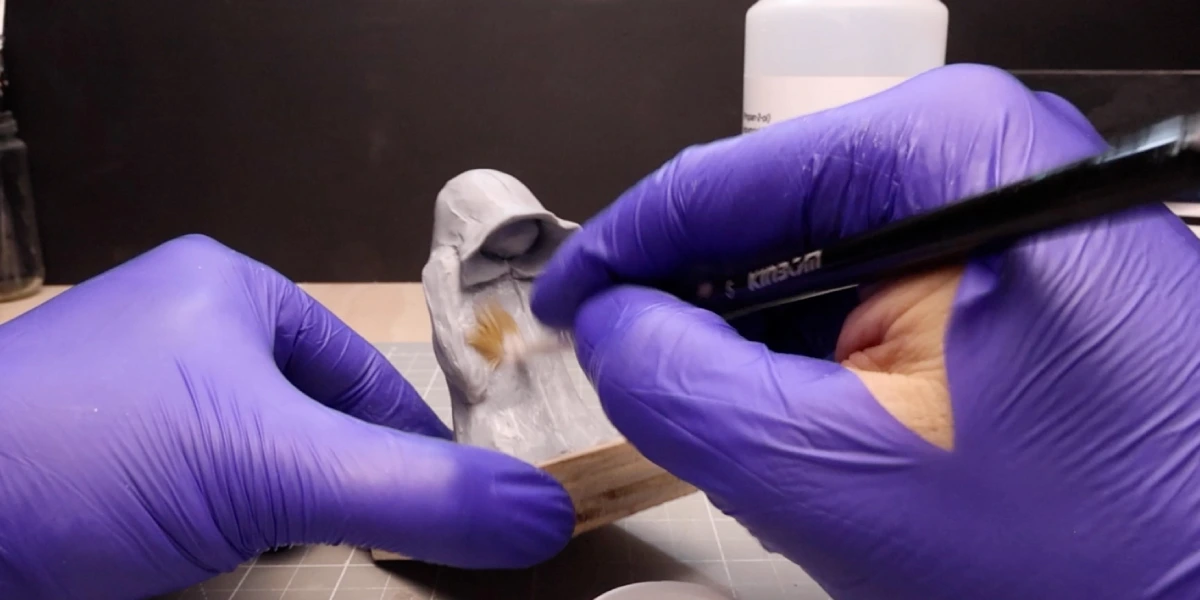
As this was a small model, a 30-minute bake time was good enough for me, but you’ll need to check the temperature and bake times depending on the type of polymer clay you’re using.
After it was baked, I decided to smooth out some imperfections even more using a little fine-grit sandpaper before moving on to paint.
Step 8: The Traitor Shows It’s True Colours
To paint, I grabbed my makeshift airbrush booth (which just consists of an old cardboard box), grabbed my super cheap airbrush, filled it with Vallejo black primer and gave it a quick spray.
I also sprayed the grave stone, mini lantern, and a couple of bonus rocks I made at the same time.
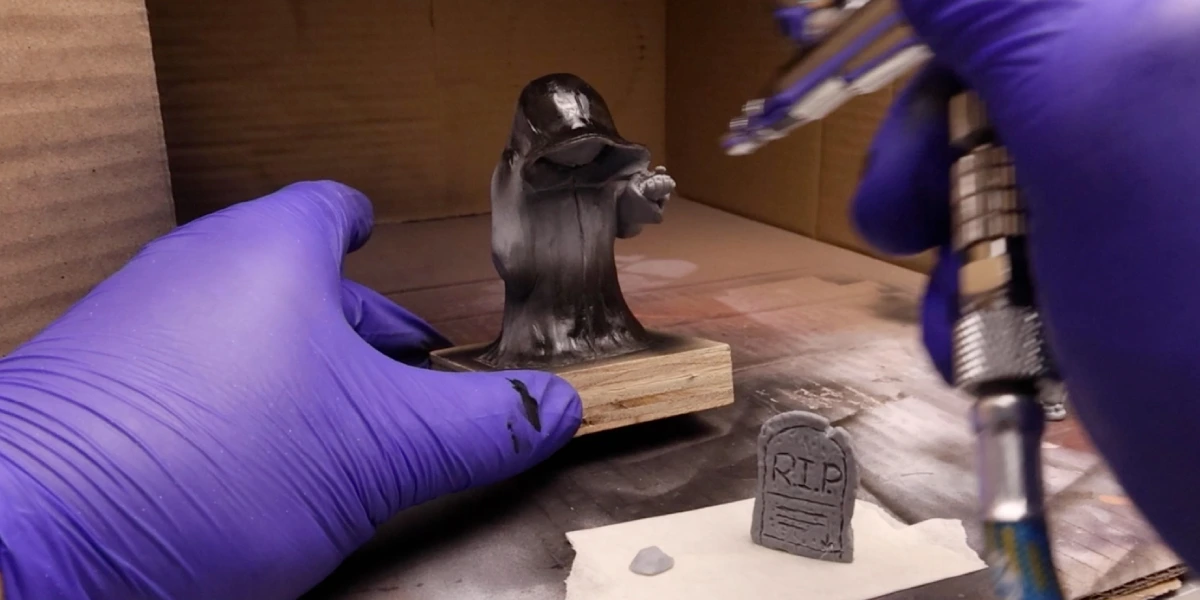
Then, it was time to wait and come back the next day to give it some colour.
To create the green for the cloak, I mixed together some black and Phthalocyanine Emerald before giving it a quick spray. What I found, though, was that the black base I had given it was making the whole thing look too dark. Perhaps I should have put on a white base coat to make the colours stand out more, but I am not professional, so I will learn from my mistakes.
After that I added a little more green and white into the mix and gave it a few more coats. After that, I mixed some of the Emerald green with white to colour the inside of the Traitors hood before moving on to the golden touches.
For that, I used a paint called Polished Gold, which gave it a metal effect. I added the insignia to the front of the cloak, painted the golden mask, and added a little golden trim to the inside of the hood.
I painted the hand a flesh colour, the grave stone and rocks in a grey by mixing black and white toghether and the miniature lantern in a blend of browns, with a white colour for the light itself.
After I had done all that, I moved on to the base, giving it a base coat of black before dry brushing on some dark greens and shades of green, black and white to add a glowing effect from the later on the floor.
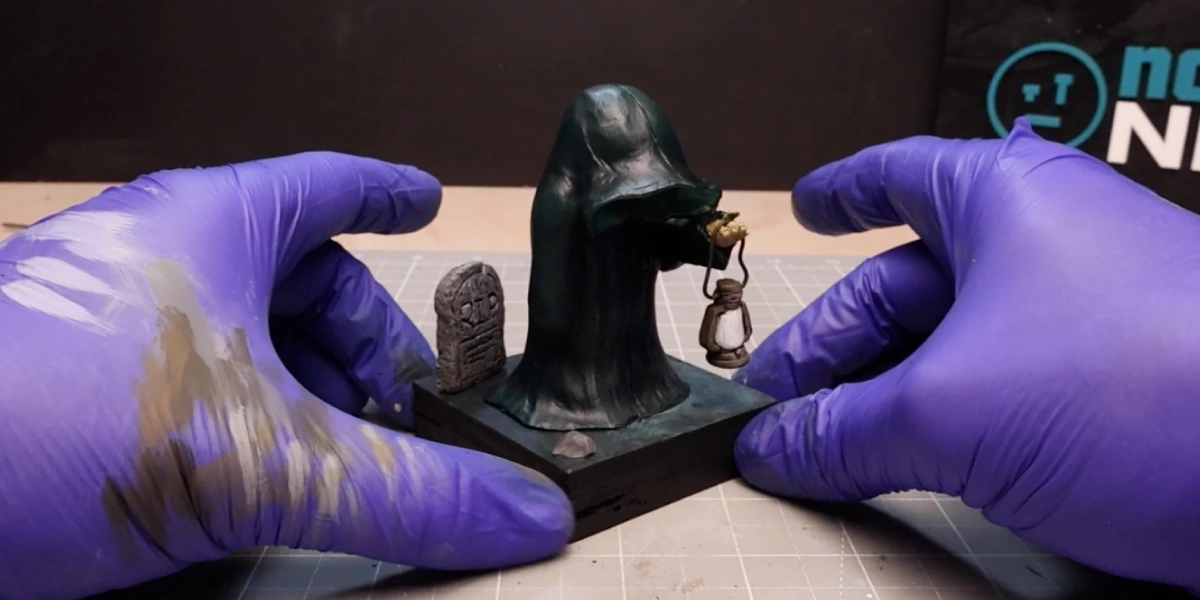
Step 9: Setting The Scene (Putting It All Together)
With all of that done, it was now time to put it all together. I placed the Traitor figure back on its base stand, glued the gravestone and rocks into position, added the lantern to the hand, and made sure that it could wing back and forth, giving you the final reveal of what you see below.
Now’s Your Turn To Give It A Go
Share your creations by commenting on my YouTube video, and be sure to tag @NoLimitNerd in your posts. If you enjoyed this tutorial, check out my YouTube channel for more fun and creative polymer clay crafts.
Remember to like the video, leave a comment with your thoughts or questions, and hit the subscribe button for weekly DIY inspiration. Thanks for sculpting with me – let’s keep creating together!
Tools I Used
Heads up. Some of these links are affiliate links if you click on them and buy something I might make money which will help you support NoLimitNerd at no extra cost to you.
Sculpting Tools
- CosClay
- A2 Cutting Board
- Pasta Maker
- Sculpting Tools
- Modelling Tools
- Vinyl Gloves
- Armature Wire 1mm
- Armature Wire 3mm
- Super Glue
Painting Equipment
- Paint Brushes
- Acrylic Paints
- Valejo Airbrush Thinner
- Air Brush Kit
- Air Brush Cleaner
- Gas Mask
- Acrylic Gloss Varnish
Filming, Audio & Tech
- Cannon EOS R8 Camera
- Cannon RF 50mm Camera Lens
- Lexar 128GB SD Card
- Softbox Lighting with Diffuser
- Camera Tripod Ball Head
- NEEWER Led Lights
- Fifine Microphone (USB)
- Rotating Display Turntable
- Black Backdrop Cloth
- Microphone Arm – for Overhead Camera
Recent Projects / View All Projects
How to Make a Miniature Cloaked Figure from The Traitors TV Series (Polymer Clay)!
How To Make Marvel RED HULK Figure with Funko Pop! Twist (Using Polymer Clay)!
How To Make a Mini Christmas Krampus Figure using Polymer Clay!